
A truly seamless workflow allows you to go from sketch to swimsuit prototype without losing time… or money. To achieve a professional level, you need to rely on ultra-precise swimwear technical sketches, comprehensive technical sheets, and suitable digital tools. Together, they enable you to communicate clearly with the factory, limit costly errors, and ensure maximum fidelity between your idea and the finished product.
A mastered workflow is not just a sequence of steps: it’s a reproducible system that improves your quality, profitability, and brand consistency in the long term.
In this approach, your role is not limited to "drawing a pretty swimsuit." You also become a project manager: you plan, document, test, and adjust. With a good process, you can:
reduce the number of prototypes needed before final validation,
standardize your requests to the factory, even if you change manufacturers,
gain speed in launching while maintaining a very high level of quality.
> Good communication with manufacturers, supported by clear documents and measurable criteria, helps you quickly correct errors and achieve a result faithful to your vision, right from the first prototypes.
Key Points
-
A structured workflow allows you to transform your sketches into prototypes more quickly and with fewer back-and-forths, which shortens your collection's launch time.
-
Detailed swimwear technical sketches (measurements, front/back view, finishes, logos) significantly reduce misunderstandings with the factory and increase the conformity rate of the first prototype.
-
The choice of eco-responsible materials (recycled nylon, recycled polyester, organic cotton, etc.) improves the durability of your swimsuits, strengthens your brand storytelling, and meets your customers' expectations regarding environmental impact.
-
Clear and documented communication with the factory (technical sheets, written validations, planning) helps you clarify costs, anticipate risks, and protect your ideas.
-
Well-chosen digital tools (CAD, project management platforms, AI) automate part of your workflow and save you valuable time on project management and prototype preparation.
Understanding the Seamless Workflow
Definition and Challenges
You must first understand what a seamless workflow is in the fashion industry, especially for swimwear. It’s a controlled process, where each step – from the first idea to the validated prototype – is designed to limit friction, errors, and wasted time. Your goal is to transform your ideas into finished products without unnecessary obstacles.
This type of workflow allows you to ensure 100% product fidelity. Every stitch, every texture, and every color must be as close as possible to the expected final result, with consistent measurement tolerances (for example, ±3 mm on the main pattern lines). You also strengthen your brand consistency: your visual identity remains strong, recognizable, and your style becomes identifiable at first glance.
A good workflow also gives you immediate commercial quality. Your prototypes are developed enough to be photographed, used in showrooms, or tested with pilot customers. You gain operational scalability: thanks to automation and standardization, you can manage larger catalogs without overwhelming yourself. Finally, you adapt your content to multiple formats (e-commerce visuals, social media, lookbooks, advertising campaigns) without randomly multiplying versions.
100% Product Fidelity: every visual and technical detail matches what you imagined.
Absolute Brand Consistency: your visual identity, color palettes, and style remain harmonized across the entire collection.
Commercial Quality: prototypes and images are ready for sale or presentation upon creation.
Operational Scalability: you can develop more models without being overwhelmed, thanks to a clearly defined process.
Multi-format Adaptability: you easily adapt your content for different sales and communication channels.
A seamless workflow gives you more control, speed, and visibility over your project. You avoid misunderstandings, failed prototypes, and production delays that burden your budget.
Why Optimize it for Swimwear
The swimwear sector demands superior technical precision compared to many other clothing categories. Fabrics are stretchy, often lined, and subjected to chlorine, salt, sand, and UV rays. Cuts must be aesthetic, comfortable, and functional, providing good support both in and out of the water. The slightest measurement deviation can alter how the swimsuit behaves on the body.
You therefore use swimwear technical sketches to communicate clearly with the factory. You explain every detail, every key measurement, the position of the straps, the width of the elastic bands, the height of the cutouts, and the finishes (raw edge, topstitching, bias binding...). This reduces the risk of error, not only in terms of style but also comfort and how the swimsuit holds up.
An optimized workflow allows you to launch your collections faster while maintaining a high level of quality. You better control your costs, avoid unnecessary prototype series, and ensure customer satisfaction by limiting sizing or support issues. Ultimately, you strengthen your brand's reputation and remain competitive in a highly visual and seasonal market.
Tip: take the time to check each step, especially during initial productions. A well-thought-out workflow provides prototypes faithful to your sketches and allows you to industrialize your style without distorting it.
Workflow Steps
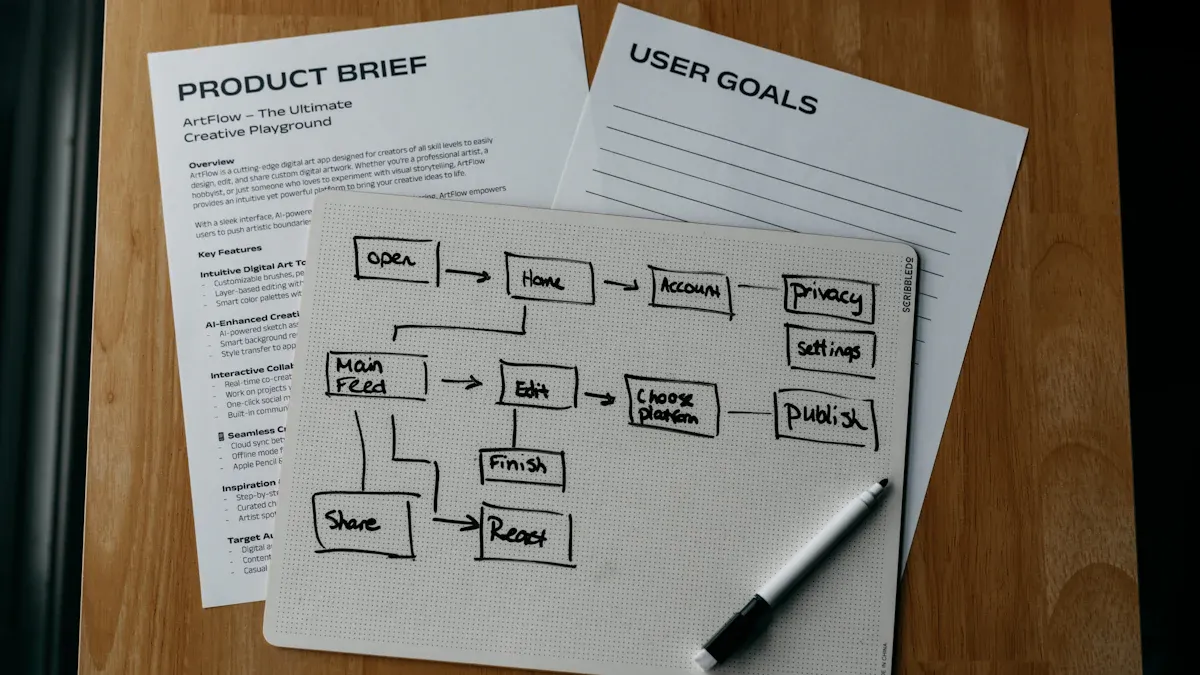 Image Source:
unsplash
Image Source:
unsplash
Inspiration and Initial Sketches
You always start by seeking inspiration, but in a structured way. Observe the trends, colors, and shapes that attract you, but also analyze the competition, prices, materials used, the best-selling cuts, and the target body types. You can create a mood board around a theme (surfer, minimalist, retro, athletic, etc.) noting for each reference what you want to keep or avoid.
You can use drawing software to create your first sketches, or a graphics tablet for greater precision. Online design platforms help you quickly visualize your ideas and test color palettes. If you want to go further, collaborate with professional designers or swimwear pattern makers: they can offer a fresh perspective, technical advice (strap type, neckline depth, support level), and save you valuable time.
Use computer software to create precise technical drawings and better communicate your intentions.
Create models on design platforms to quickly test several variations of the same style.
Collaborate with professional designers or pattern makers to ensure the proportions, volumes, and lines of your design.
Tip: don't limit yourself to a single source of inspiration. Mix styles, textures, and market references to create a truly unique design – while remaining compatible with your production capabilities.
Swimwear Technical Sketches and Tech Pack
After your initial sketches, you move on to swimwear technical sketches. These technical drawings show every detail of your swimsuit: seams, finishes, logo placements, elastic widths, neckline depths, panty curves, etc. You add precise measurements (with tolerances) for each important line, as well as indications on the types of stitches used (zigzag, flatlock, overlock...).
You complement these drawings with a comprehensive technical sheet. This sheet describes the materials, colors, sizes, but also:
the exact fabric composition (for example: 78% recycled polyamide, 22% elastane),
the weight (e.g., 190–210 g/m² depending on the model),
the type and width of elastic bands,
assembly and finishing instructions,
tests to be performed on prototypes (chlorine resistance, colorfastness, wearing comfort).
Detailed technical sheets provide precise information on materials and designs. They clarify production requirements, reduce errors, and serve as a reference for the entire chain – from cutting to quality control. Effective communication with manufacturers begins with clear, structured, and complete documents.
Swimwear technical sketches serve as a common language between you and the factory. You avoid misunderstandings, arbitrary interpretations, and unvalidated modifications. You save time during exchanges and better control each requested adjustment.
Tip: always ensure your swimwear technical sketches are clear, legible, and complete before sending them to the factory. If possible, add a summary of critical points (tolerances, elastic type, support areas) so that no one overlooks them.
Material and Color Selection
You must choose materials that guarantee the quality, durability, and comfort of your swimsuit. Prioritize eco-responsible fabrics such as recycled nylon, organic cotton, or recycled polyester. These materials respect the environment while offering good resistance to chlorine, salt, and UV rays. Certifications like Fair Trade or Oeko-Tex Standard 100 strengthen your customers' trust in the safety and transparency of your fabrics.
To go further, you can also consider technical criteria:
the weight (for example, 180–220 g/m², depending on the desired support),
the elasticity and recovery rate of the fabric after stretching,
pilling resistance,
color stability after exposure to salt and chlorine.
Colors also play a key role. Vibrant colors and pastel tones are very trendy and allow you to segment your collections (beach, sport, family, etc.). You can mix colors or textures (ribbed, waffle, textured) to create original and flattering designs for different body types.
Note: the choice of materials and colors must always match your brand image and customer expectations. Don't forget to request samples and test them for washing, sun exposure, and real-world conditions.
Communication with the Factory
Good communication with the factory remains essential for a successful swimsuit prototype. You must clarify manufacturing costs, minimum quantities, lead times, payment terms, and any hidden costs (transport, customs formalities, additional modifications, etc.). Also, remember to discuss confidentiality and the protection of your ideas. A confidentiality agreement protects your intellectual property, especially if you develop signature details or exclusive prints.
Clarify manufacturing costs, ancillary fees, and payment terms before launching a prototype.
Discuss confidentiality, rights over patterns, prints, and visuals, as well as the factory's reuse limitations.
Favor direct communication and, if possible, on-site visits to understand technical capabilities and build a genuine relationship of trust.
You may sometimes encounter obstacles: multiple contacts, geographical distance, cultural differences, or unanticipated technical constraints. Adapt your communication to each situation, rephrase when necessary, and don't hesitate to illustrate your requests with photos, annotated diagrams, or videos. Remain flexible and responsive to changes, while keeping a written record of every decision.
Tip: use digital tools to centralize exchanges (emails, visuals, technical sheets, comments) and keep a written record of each validation. This helps you quickly resolve disputes and track the history of each prototype.
Prototype and Adjustments
To transform your sketch into a functional prototype, you follow several key steps:
You finalize the design with your swimwear technical sketches, validating all important measurements and tolerances.
You initiate prototyping at the factory based on your technical sheet and pattern.
You perform wear tests to check the comfort, fit, support, and behavior of the swimsuit in motion.
You adjust the pattern and/or materials according to feedback (elastic tension, cutout height, cup depth, etc.).
Each step requires rigor. The goal is not just to get a "pretty" swimsuit, but a product consistent with your target audience, price positioning, and use (beach, sports swimming, surfing, etc.). Take the time to analyze every piece of feedback: gaping areas, slipping straps, riding-up bottoms, lack of support… Every identified defect must translate into a clear correction on the pattern or technical sheet.
Tip: don't hesitate to create several prototypes if necessary. The final quality depends on your perseverance and exacting standards. A prototype validated too quickly can lead to costly product returns once the swimsuit is for sale.
Digital Tools and Innovations
CAD and Swimwear Technical Sketches
You use CAD (Computer-Aided Design) to improve the precision of your swimwear technical sketches and patterning. These tools allow you to create detailed digital drawings, grade your sizes more quickly, and simulate how the product will fit on the body.
You can test different colors, textures, and patterns without wasting materials. 3D visualization helps you see the final render before manufacturing, checking the balance of volumes, strap width, or armhole depth. You save time and avoid patterning errors that require multiple correction prototypes.
Here are some digital tools widely used in swimsuit design:
Valentina/Seamly2D: free, cross-platform, integrated grading, ideal for creating and adjusting custom patterns.
Inkscape: precise vector drawing, extensions for patterning, useful for detailing technical sketches and explanatory diagrams.
Sewist CAD: online creation, instant custom patterns, practical for quickly testing model variations.
Tip: get into the habit of saving each version of your drawings (v1, v2, v3…) to track your project's evolution, revert if necessary, and document decisions made with the factory.
Artificial Intelligence and Personalized Design
Artificial intelligence transforms how you personalize your creations and present your swimsuits. You can integrate real products into AI-generated images, as the Undiz brand did for its swimsuit campaigns. AI helps you retouch visuals, adapt backdrops to your target (tropical beach, designer pool, urban rooftop), and improve the models' appearance without multiplying photoshoots.
You can also analyze demographic data and purchasing behaviors to understand which cuts, colors, or sizes sell best. This information helps you propose designs better suited to each customer segment and better prioritize models for prototyping.
AI makes each campaign more effective by allowing you to test several visual concepts before launching final photoshoots.
You overcome certain technical limitations (complex retouches, real product integration) and create innovative visuals at a lower cost.
Project Management Platforms
You use digital platforms to automate and organize your workflow. These tools reduce manual and repetitive tasks (reminders, document sending, modification tracking). You quickly adapt your processes to new market trends and customer feedback.
An optimized digital workflow streamlines task management, reduces errors, and improves collaboration among all project stakeholders (designer, pattern maker, factory, marketing).
Time savings in task management (fewer scattered emails, more visibility on progress).
Better process traceability (who decided what, when, with which reference files).
Reduction of operational costs thanks to more fluid organization and fewer communication errors.
You maintain control over each step, from idea to production, and you can document your workflow to better replicate it for your future collections.
Mastering Costs and Modeling
Considering Fixed Costs
You must always identify fixed costs before launching your swimsuit project. These expenses remain constant, regardless of the number of prototypes created. By listing them from the start, you ensure budget stability and avoid underestimating the true cost of your collection.
Here are the main fixed costs to monitor:
Creative software subscriptions: you use tools like Adobe Illustrator or CAD platforms. These subscriptions represent a monthly or annual expense that must be included in your cost price.
Rent: you pay for your workspace (studio, shared office, showroom, etc.).
Team salaries: you compensate the people who assist you (designers, pattern makers, marketing managers, project management).
Business support: you invest in professional advice, training, or support services to grow your business.
Tip: note each cost in a table to clearly visualize your fixed and variable expenses. You avoid unpleasant surprises and maintain control over your budget when setting your selling prices.
Budget Modeling and Adjustments
You must model your budget to anticipate expenses and adjust your choices in real-time. A simple, well-structured spreadsheet can become your best ally: you compare costs based on the number of prototypes, chosen materials, manufacturing options (lining, higher quality elastics, packaging, etc.).
You can create a column for each expense item and a row for each project stage. This allows you to quickly identify optimization levers (changing suppliers, reducing the number of colors, adjusting the minimum production quantity).
Expense Item |
Estimated Cost |
Possible Adjustment |
|---|---|---|
Creative Software |
€30/month |
Change subscription or opt for an open-source alternative |
Rent |
€400/month |
Share space or negotiate lease |
Salaries |
€1200/month |
Outsource certain tasks or adjust roles |
Support |
€200/month |
Reduce services or group training |
You adjust your budget based on prototype feedback. If the fabric is too expensive, you choose an equivalent but more affordable alternative. If the design requires more assembly time than expected, you review the complexity of certain details. You always keep a margin for unforeseen circumstances (additional modifications, delays, transport).
Tip: update your budget at each key stage (sketch, prototype, validation, production). You make better decisions and ensure the viability of your project while respecting your margin objectives.
Concrete Example of a Successful Workflow
 Image Source:
pexels
Image Source:
pexels
Imagine you want to launch your first swimsuit collection. You decide to follow a seamless workflow to avoid errors and maintain control over your budget. You start by gathering inspiration images on Pinterest and Instagram, but also by observing the best-sellers of major brands and the specific needs of your target clientele (sport, maternity, plus sizes, etc.). You note recurring colors, cuts that work well, and those that pose problems.
You then draw your ideas on a graphics tablet. You use drawing software to create precise sketches, then move on to swimwear technical sketches, adding measurements, notes on finishes, and logo placements. For each model, you create a complete technical sheet (materials, weight, colors, sizes, comments dedicated to the factory).
You choose a recycled fabric and select three main colors, ensuring they can be produced without excessive delay. You add these choices to your technical sheet, with precise references to avoid confusion. You send your digital files to the factory and use a project management platform to track each step: receipt confirmation, technical questions, prototype shipment, feedback, and corrections.
You receive a first prototype and try it on a mannequin, then on several body types (where possible). You notice that the cut doesn't quite meet your expectations: the bottom rides up too much, the strap pulls slightly, the lining lacks support on a specific size. You modify the pattern in your CAD software, adjust certain measurements, and add precise comments on the platform to explain the changes.
The factory manufactures a second prototype. This time, the cut, color, and fit in the water are consistent with your vision. You validate the model, finalize your budget, and can launch your collection. This structured workflow allows you to save time, reduce back-and-forths, and avoid costly large-scale errors.
Tip: always take the time to check every detail in your digital files and technical sheets before sending them to the factory. This final check helps you obtain a prototype faithful to your vision and limit revisions.
To succeed with your swimsuit prototype, you must structure your workflow, use precise swimwear technical sketches, and leverage the right digital tools. Simultaneously, rigorous cost management allows you to remain competitive, even for small batches.
Develop a strong and consistent brand style so that your designs are recognizable.
Engage your community with marketing campaigns aligned with your visual universe and values (durability, comfort, performance).
Engage your customers, collect their feedback on cuts, materials, and sizes, and use this information to improve your next prototypes.
Adopt these best practices to optimize your creations, structure your workflow, and sustainably attract your target clientele.
FAQ
How to choose the right fabric for a swimsuit?
You should prioritize fabrics resistant to chlorine, salt, and UV rays, with good elasticity and recovery after stretching. Opt for recycled or Oeko-Tex certified materials to reassure your customers about environmental impact. Ideally, choose a weight around 180–220 g/m² for good support, and always ask for a sample before validating your choice. Test it in real conditions (water, sun, washing) before going into production.
Why are swimwear technical sketches essential?
Swimwear technical sketches explain every detail of your design: shapes, measurements, seams, logos, straps, finishes… They serve as a common language between you and the factory. Without them, everyone interprets sketches in their own way, and the risks of error skyrocket. With clear technical drawings, you save time, reduce misunderstandings, and obtain a prototype much more faithful to your idea from the first trials.
Which digital tools facilitate prototype creation?
You use CAD software like Seamly2D or Inkscape to easily draw, modify, and share your designs. These tools help you create precise patterns, manage size grading, and visualize the final render before manufacturing. You can also complement your workflow with project management platforms to track exchanges with the factory, prototype corrections, and validations at each step.
How to avoid errors when communicating with the factory?
Always draft a clear, structured, and up-to-date technical sheet. Use project management platforms to centralize exchanges, files, and decisions. Request written validation at each important stage (sketch, pattern, prototype, corrections). The more precise and documented your communication, the less room you leave for misunderstandings.
How to manage the budget for a prototype?
You create an expense tracking table, distinguishing fixed costs (software, rent, team) from variable costs (materials, prototypes, transport). You adjust your choices of fabrics, finishes, or model complexity based on the actual cost you observe. By keeping a margin for contingencies and updating your table after each step, you remain profitable while preserving the quality and image of your brand.